I have learned much over the course of the past year hosting The Lead podcast. As I continue to host this academic year, I have found that very little digital resources exist that explain the process behind creating and distributing a podcast. Here, I seek to change that. This article will serve as a step-by-step guide to the process (well, my process) for interviewing, editing, distributing and promoting The Lead. My goal here is that others will find this useful for years to come, and those of you thinking about starting a podcast will finally make the leap.
The tools and tips I will be discussing have also proven useful for constructing and editing audio stories for radio and/or digital. These technical skills are great to fiddle with and hone now.
Interviewing
The Lead in particular is an interview-based podcast, but these tips can be applied to other styles of podcasting as well.
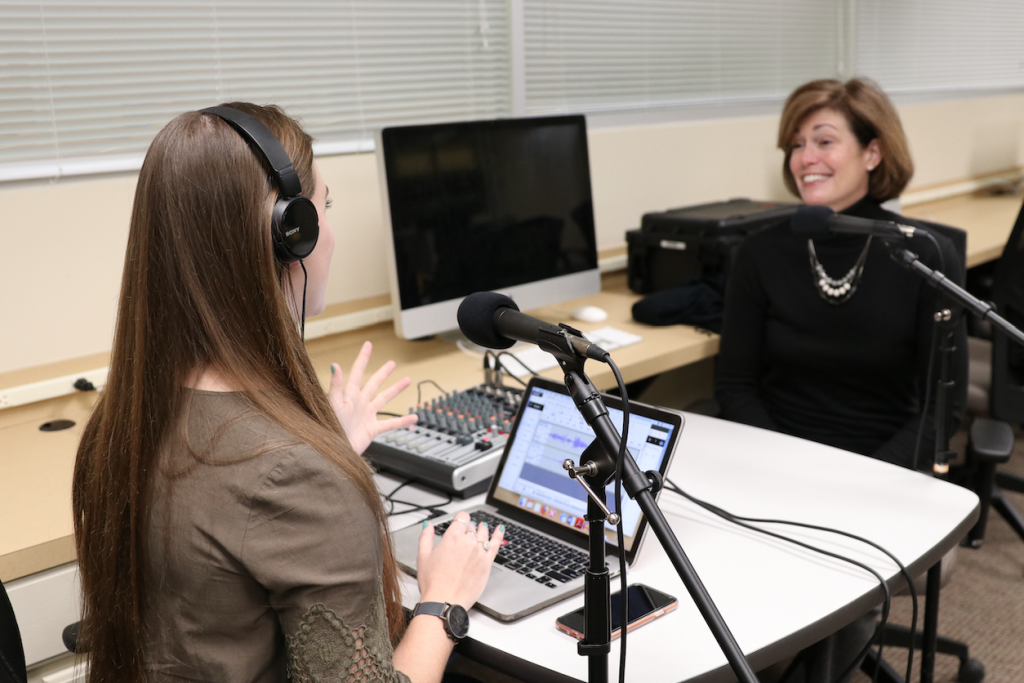
- Setting: You don’t need a professional sound booth or recording studio to produce quality audio. What you do need is a quiet room that you can dedicate to recording your interview and script. I use a classroom space on campus. Many campuses offer some method of reserving rooms for students and faculty, and this also provides a neutral and professional location for you, your team (if you have one) and your guests to meet you.
- Room Tone: Visit the space before you record for the first time and maybe try a few test recordings to gauge the room tone. This will allow you to determine if the air conditioning or noise outside of the room is too loud to clean up in the editing phase.
- Brand: Because The Lead is an interview-based podcast, I sit down with a guest for about 20 minutes. I prepare about eight to 10 questions ahead of time to keep our brief conversations substantive and “on brand.” Podcasts typically have a brand, theme, or purpose. For The Lead, our brand is “How to get ahead in the media industry from the people who did.” I interview successful media leaders from the point of view of a journalism student. Our target audience, therefore, is just that: entry-level journalists and journalism students. Having a clear brand in mind helps you frame your episodes, target your audience, and find your style.
- Mic Placement: Whether you’re using the microphone built into your phone or a typical microphone (such as those seen in the photo above), mic placement is important. Positioning the microphone directly in front of one’s mouth allows the mic to capture your hard consonants. This creates a less smooth listening experience. You will notice that I place my mics to the side of the mouth to avoid that issue. The mics also tend to sit very close to the mouth to pick up clearer audio.
Equipment
I am going to discuss the different kinds of equipment I use for the podcast, focusing on a few key pieces that I think are worth prioritizing.
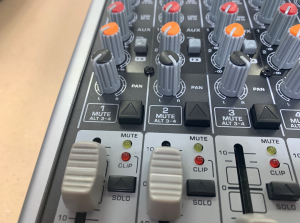
- Soundboard: We use a Behringer 24-bit soundboard. This technology allows me to control the volume and tone of individual microphone channels. This is particularly important because I choose to record with split channels: one microphone channel pushed all the way to the left and the other all the way to the right (see photo for reference). When recording, this means that one microphone is only being recorded through one channel, rather than two. I’ve learned that this enables me to single out one microphone’s recording when editing rather than having to deal with one person’s voice across two channels. Once I am finished editing, I mix the two separate channels down to one channel (or “mono”).
- Laptop: I use my personal 2015 Macbook Pro to plug the soundboard into via USB and record the interviews. I also use my laptop during interviews to pull up my Google Doc of scripts and interview questions. This limits the sound of pages flipping by writing down the questions on a reporter’s notebook (been there, done that, 10/10 don’t recommend).
- Microphones (plus mic stands): During the interviews I use Shure SM57 mics connected to the soundboard using basic XLR cables. I also have a Blue Yeti microphone for personal use that I will use to record intros and outros for the episode. This is helpful during the editing phase, which always takes place off campus.
- Headphones: I use a pair of over-the-ear headphones. The exact pair I use are Beats Studio 3 headphones, which are my personal pair. I have found that the use of headphones while recording and editing makes for an easier experience overall. When you wear over-the-ear headphones while recording the podcast, you can hear the microphone levels more clearly than you would with earbuds. Also, the use of headphones in general while recording enables you to hear precisely what the microphones are picking up (someone tapping their foot, noise outside of the room, the pop of a “p” sound). While editing, the same logic applies. You are able to hear random sound distractions in the audio that you can attempt to correct while editing.
- Portable Recorder: I occasionally will take the podcast on the road, and when I do this, I take a Tascam Portable Studio Recorder. This recorder is built to record music, but it works great when collecting audio. This is also a great alternative to a soundboard. For my mobile podcast kit, I will pack this, two short XLR cables, my two microphones and a pair of headphones. It all fits in a backpack, which is my typical metric of size since I’m a college student.
A note on equipment: Nothing on this list is by any means necessary to produce a quality podcast. I could theoretically record The Lead using two cell phones held up to my and my guest’s mouths and use those files to edit with. However, this equipment enables me to create higher quality audio. This podcast is sponsored by The Cox Institute for Journalism, Innovation, Management and Leadership, and much of this equipment was purchased and is owned by the institute. I am personally an audio lover, so I have invested in some personal equipment for this use as well.
Editing
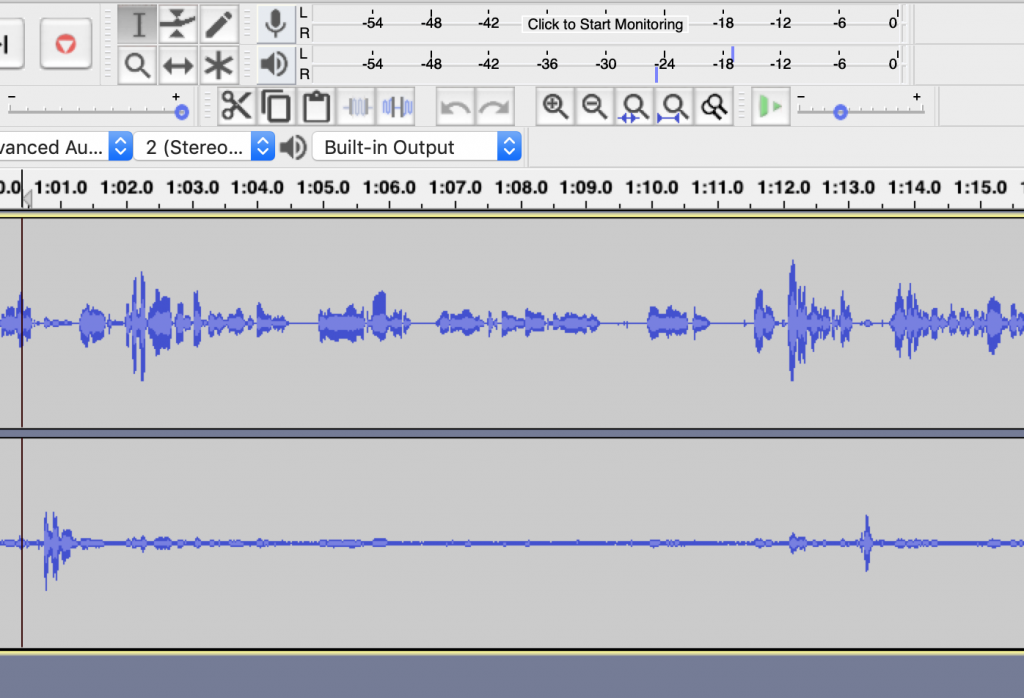
- Software: I mostly use Audacity, which is a free desktop application you can download to your computer. Audacity is simple in that you won’t be able to mix the next great Avatar soundtrack on it, but for the purposes of a podcast (producing good, clear audio with simply layering), it works like a dream. I also use Adobe Audition occasionally for more advanced features, such as de-essing.
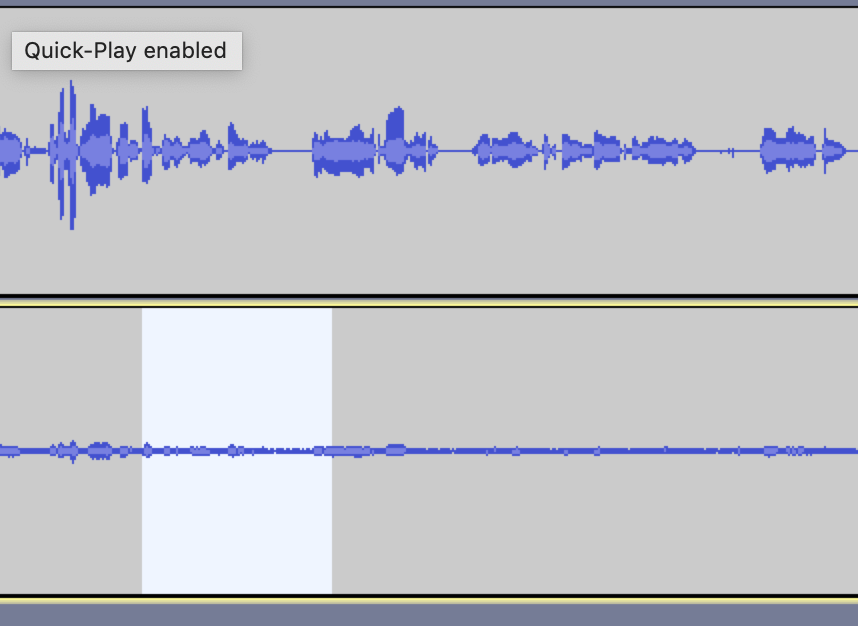
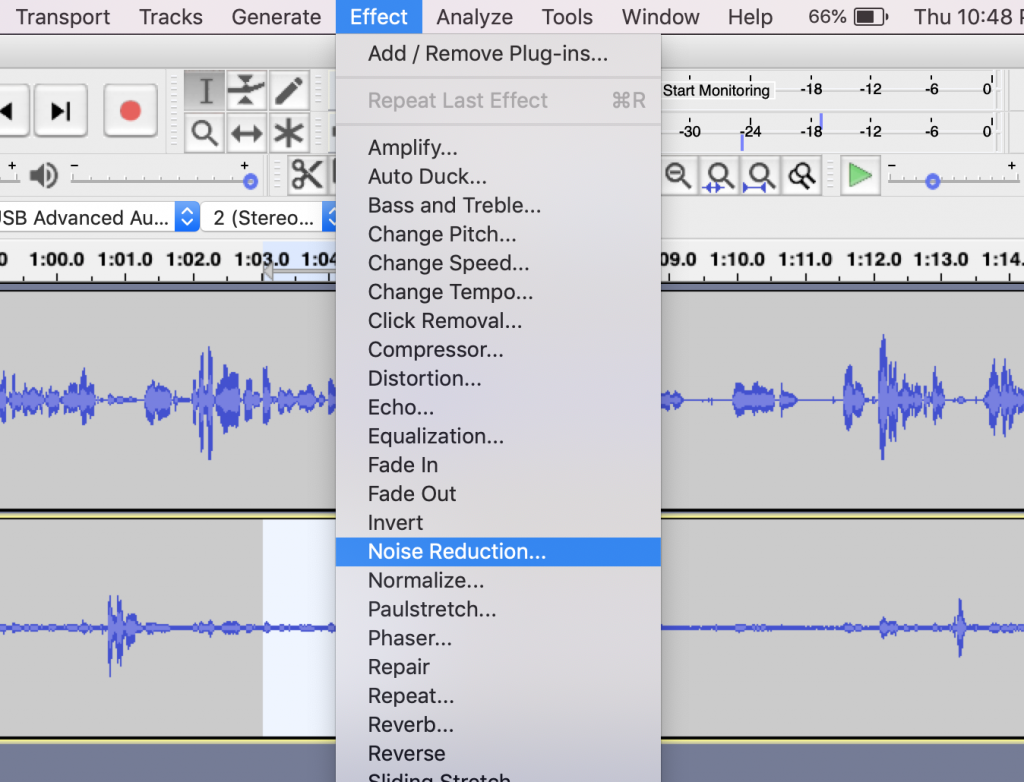
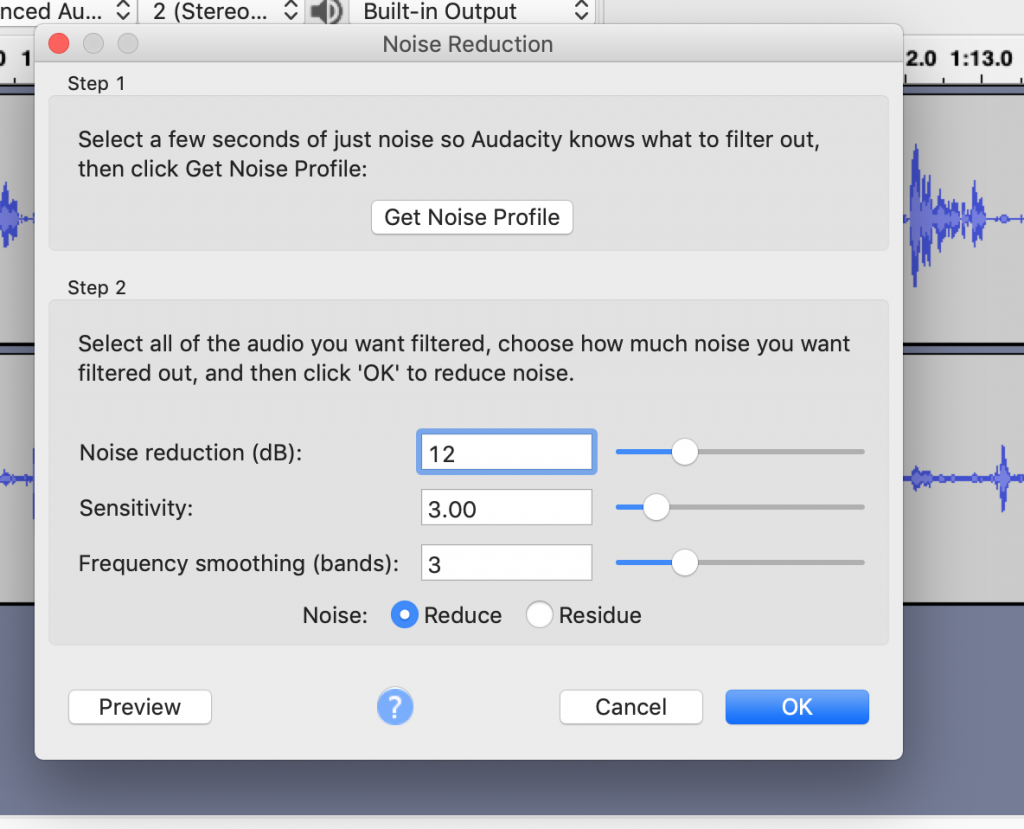
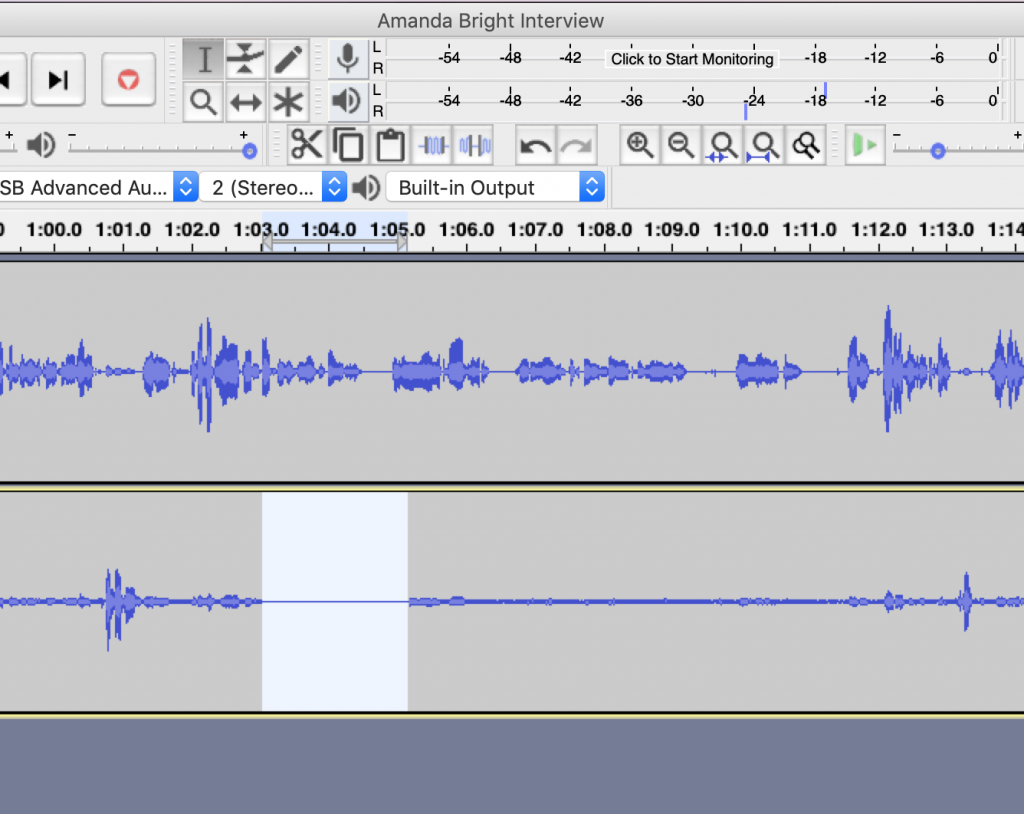
- Sound Effects: By far the most used feature on Audacity that I use is “Noise Reduction.” What this feature does is examine the noise in a clip of audio you select and will reduce that sound when applied to the whole audio file. Other common tools that I use under the “effects” tab is “amplify” and “fade”. “Amplify” is pretty self-explanatory. It helps increase the volume of a clip. This is useful for when someone is soft-spoken or murmurs a word under their breath, and you want to be sure your reader hears it. “Fade” allows you to fade audio in or out. This provides a useful transition from one section of your story or podcast to the next. For example, in any given episode of The Lead, I will use the “fade” option to fade out my theme music and transition into the conversation.
Here is a quick tutorial on the “Noise Reduction” feature:
- Music: I found my theme music from Tribe of Noise (formally Free Music Archive), which is just that, a free music archive that has tons of different genres of music. This is perhaps one of the more tedious aspects of putting your podcast together, but only you know what style you are shooting for. This archive has what you’re looking for, but you might have to listen to hundreds of songs to find it. Music has the ability to set the tone for your topic of conversation, and it is also a great opportunity to show some style.
Distributing
- Platform: When the podcast was first launched in 2016, it was distributed via SoundCloud. This is a free platform for audio, and it allows you to organize the content and share episodes on social media. When I took over for the podcast in 2018, we opted to convert the distribution platform to Podbean, which costs $9 a month. We decided to move the podcast to this platform in order to make the podcast more accessible to listeners on mobile. Podbean allows me to seamlessly publish the podcast across the major podcast platforms: Apple Podcasts, Google Play and Spotify. Do some research because there are several platforms out there for podcasts. Find the platform that works best for your goals.
- Schedule: Releasing a podcast on a schedule makes you a consistent listen for your audience. You don’t have to publish a podcast every single day to have an audience, but I would recommend setting a schedule that is manageable for you. By being consistent with your uploads, your audience will know that they can rely on you for a steady stream of content. The Lead posts six episodes each season. Seasons are divided between semesters, and I upload every two weeks, for example.
Promoting
- Visual Material: I created The Lead logo and album cover using Canva, another free graphic design platform. I am able to customize the sizing and file types with ease, and I even use Canva to create social media quote cards and files to print physical promotional material like stickers and flyers.
- Social Media: I recommend creating an account on social media dedicated to your podcast. For The Lead, we chose Twitter as our platform since most of our audience is on Twitter. Social media also allows you to interact with your guests on a public platform, thus broadening your audience. Choose a platform that makes sense for your audience.
- Your Network: Use your current network to build your audience from the ground up. Get your parents, friends, professors and classmates to check it out. Let’s make self-promotion a thing (without the “shameless” caveat. Why should shame be involved?). Support others trying to launch their own cool projects too!
I hope this serves as a helpful resource for those seeking to up their podcasting or audio storytelling game. Many elements go into making a podcast, but going through the motions of strategized creative communication makes you a better media professional. These tools are all things that I have picked up over the course of a year, but I have had a blast figuring out each puzzle piece. And as always, give The Lead a listen.